
Why Maintenance Separates Profitable Mowing from Expensive Mowing
A traction mower is a simple machine with relatively few moving parts — but every one of those parts operates under continuous high-frequency load. The knife bar completes roughly 540 shearing cycles per minute, the pitman arm converts rotary PTO motion into reciprocating lateral motion thousands of times per hectare, and the guards absorb vibration from every stem cut, every stone grazed, and every hidden stump struck. Without a structured maintenance routine, these components wear in predictable ways that degrade cut quality, increase fuel consumption, and ultimately cause field breakdowns that cost far more than the parts they replace. Australian hay producers running 300–600 hectares per season on a traction single-blade mower like the 9GD-2.5 can expect to spend AUD $400–$800 annually on consumable wear parts — blade sections, guards, bearings, and skid shoes. That figure rises sharply when maintenance is deferred: a seized pitman bearing caused by missed greasing runs AUD $600–$1,200 to repair, and a broken pitman arm from a worn bearing that was never replaced can cost AUD $900–$1,500 including downtime during the harvest window. This article covers every maintenance task, interval, and common repair for keeping a traction mower productive across multiple seasons.
A well-maintained mower keeps the entire harvest chain running — delays at the mowing stage cascade through raking, baling, and wrapping.
Daily Maintenance Checklist: 10 Minutes That Prevent 10 Hours of Downtime
Before the first pass each morning, walk the cutter bar end to end. This takes less than ten minutes and catches 80% of developing issues before they cause a field failure. Here is the sequence experienced operators follow.
Inspect Blade Sections
Check each knife section for chips, cracks, and edge rounding. A section with a visible chip wider than 3 mm should be replaced immediately — it will tear rather than cut, and the uneven mass creates vibration that loosens adjacent bolts. Carry 6–8 spare sections and the correct rivets or bolts for field swaps.
Check Guard Plates
Sight along the bar from one end — any guard that sits higher or lower than its neighbours is bent. Test the ledger plate on each guard by sliding a fingernail across it: if you feel a lip or step, the ledger is chipped and the guard should be replaced. On sandy or rocky soils, expect to replace 2–4 guards per 100 hectares.
Grease All Zerks
The 9GD-2.5 has four grease points: pitman bearing (2 zerks), wheel hub bearings (1 per side). Use lithium-complex EP2 grease rated for high-vibration applications. Two to three pumps per zerk is sufficient — over-greasing blows seals. Interval: every 8–10 operating hours, or once per mowing day.
Tighten Knife-Bar Bolts
Vibration progressively loosens the bolts securing knife sections to the bar back. Check torque with a socket wrench — do not overtighten, as this distorts the section alignment. Replace any bolt that shows thread damage or stretch. A loose section can detach at operating speed and damage adjacent guards.
Clear Debris from Pitman Area
Grass stems, wire, and twine wrap around the pitman arm and connecting rod during operation. Remove all wraps daily — accumulated material increases friction, overheats the bearing, and can bind the stroke mechanism. Use side-cutters to remove wire wraps; never pull them by hand near the blade bar.
Blade Sharpening: Methods, Angles, and When to Replace Instead
Sharpening extends blade-section life and maintains the shear quality that produces a clean cut. But there is a point where sharpening no longer restores adequate edge life, and replacement is the better option. Understanding the difference saves both time and hay quality.
Bench Grinder Method
The most common workshop approach. Use a fine or medium aluminium-oxide wheel (60–80 grit) spinning at low to medium speed. Hold the section at the original bevel angle — 22–25 degrees for the 9GD-2.5 — and draw it across the wheel in smooth, even passes. Apply light pressure; heavy pressure generates heat that draws the temper from the steel, turning the edge blue and softening it. The heat-affected zone is visible: if the edge shows discolouration past a light straw colour, you have ground too aggressively. Dip sections in water between passes on hot days. A competent operator can sharpen a full 2.5 m bar’s sections in 30–40 minutes.
Angle Grinder in the Field
Some operators touch up sections with a 125 mm angle grinder during a fuel or smoko break. This works as a quick interim measure — 5–10 passes per section restores enough edge for another 5–8 hectares in light grass. However, angle grinders remove material unevenly and are difficult to hold at a consistent bevel angle, so the sections should be properly reground on the bench at the end of the day. Never use a cutting disc — only a grinding disc — and wear eye protection and gloves.
When to Replace Rather Than Sharpen
Replace a section rather than sharpening when: the cutting edge is ground back to less than half its original width (the section has been sharpened 4–6 times); any crack is visible at the rivet hole or along the back edge; the section is bent or warped from a stone strike; or the heat-treatment line is no longer visible, indicating that all hardened steel has been ground away. A full set of replacement sections for the 9GD-2.5 runs AUD $120–$180, and EverPower keeps both standard and heavy-duty section options in stock at Condell Park.
Keeping every machine in the harvest chain maintained prevents bottlenecks during the short seasonal cutting window.
Pitman Arm and Drive Mechanism: Wear Patterns and Repair
The pitman arm converts the PTO’s rotary motion into the lateral reciprocating movement of the knife bar. It is the hardest-working component on the mower and the most common source of mechanical failure when maintenance is neglected. The pitman assembly consists of a forged or cast arm, a ball joint (or wrist pin) at the knife-bar end, and a bearing at the PTO-driven end. Wear typically presents in this order.
First, the ball joint develops play — detectable by lifting the knife-bar end of the pitman and checking for movement exceeding 1–2 mm. Excessive play allows the bar to slap at each stroke reversal, which hammers the guard bolts and accelerates section wear. A replacement ball joint costs AUD $40–$80. Second, the pitman bearing wears. Signs include heat buildup at the bearing housing (too hot to hold your hand on for more than three seconds), audible grinding, or visible grease discolouration (grey or metallic flecks in the expelled grease indicate metal-on-metal contact). A replacement bearing kit costs AUD $60–$120. Third, if the bearing seizes and the arm continues to operate under PTO load, the arm itself can crack or break — a catastrophic failure that typically requires a full pitman replacement at AUD $250–$450 plus labour. Replacing the ball joint and bearing at their first signs of wear prevents the expensive third stage almost entirely.
Skid Shoes: Wear Rates and Height Recalibration
The skid shoes on each side of the cutter bar set the cutting height and protect the guards from ground contact. They are sacrificial wear items — designed to abrade rather than the more expensive guard plates. On clay soils in the Hunter Valley or black-earth country near Moree, steel skid shoes wear slowly and may last 200–300 hectares before needing replacement. On abrasive sandy loam in the Mallee or volcanic soils in western Victoria, wear rates double: shoes can lose 3–5 mm of height in a single day of continuous mowing, effectively lowering the cutting height below your target without any visible adjustment.
Check shoe height against a ruler at the start and end of each mowing day. When cumulative wear exceeds the adjustment range of the mounting slots — typically 15–20 mm — replace the shoes. Aftermarket hardened-steel or tungsten-carbide-tipped shoes are available and extend wear life by 2–3 times, though they cost 50–80% more than standard shoes. For producers on highly abrasive soils mowing 400+ hectares per season, the longer-life shoes pay for themselves within the first season by eliminating mid-season shoe changes and the cutting-height inconsistency they cause.

Downstream wrapping equipment relies on consistent bale quality — which starts with a well-maintained mower delivering a clean, even swath.
Seasonal Maintenance: Pre-Season and End-of-Season Tasks
Beyond daily checks, two deeper maintenance sessions each year keep the mower reliable across its full operating life.
Pre-Season (Before First Cut — Typically September)
Remove the knife bar and inspect every section, rivet, and bolt. Replace all sections that show cracks, heavy edge loss, or heat discolouration. Inspect all guard plates — remove each one, check the ledger plate for chips or wear grooves, and replace any guard with a ledger worn below half thickness. Repack or replace the pitman bearing if it showed any play or heat at the end of the previous season. Check the PTO driveshaft for universal joint wear — grab each yoke and check for angular play. Worn U-joints create vibration that transmits through the entire drive train and accelerates wear on every downstream component. Replace the PTO shaft guard if it is cracked or missing sections — a rotating PTO shaft with a failed guard is one of the most dangerous hazards on any farm. Inflate tyres to the manufacturer-specified pressure and check wheel bearings for play or roughness.
End-of-Season (After Last Cut — Typically April/May)
Wash the entire mower with a pressure washer to remove dried-on crop material, soil, and fertiliser residue — all of which are corrosive over a storage period. Grease all zerks generously (the off-season grease coat protects bearing surfaces from moisture). Coat the knife bar and sections with a light film of used engine oil or a dedicated corrosion-prevention spray. Store the mower under cover if possible; if outdoor storage is unavoidable, raise the cutter bar off the ground on blocks and cover the drive mechanism with a tarp to prevent UV degradation of seals and hoses. Remove and store the PTO shaft indoors — UV and moisture degrade the plastic guard and the rubber seals on telescoping shafts.
Whether single-blade or double-blade, every mower type benefits from the same discipline of routine maintenance and seasonal servicing.
Common Repair Cost Reference
Planning a maintenance budget is easier with approximate costs. The table below covers the most frequently replaced components on a 2.5 m traction single-blade mower operating in Australian conditions.
Troubleshooting: Three Field Problems and Their Fixes
When something goes wrong mid-paddock, diagnosing the cause quickly keeps the day on track. These are the three most common field problems reported by 9GD-2.5 operators.
🔧 Problem: Vibration increases progressively during operation
Likely cause: A loose or missing knife section, or a section that has shifted out of alignment. Stop the PTO immediately, inspect the bar, and tighten or replace the offending section. Running with a missing section creates an imbalanced reciprocating mass that accelerates wear on the pitman bearing and can crack the knife-bar back.
🔧 Problem: Knife bar stalls or hesitates under load
Likely cause: Insufficient PTO horsepower (see our tractor-matching guide), or crop debris packed between the knife sections and the bar back. Stop, disengage PTO, and clear any packed material with a screwdriver or flat bar. If the problem persists in clean conditions, the tractor may be undersized for the crop density — reduce ground speed to lower the instantaneous cutting load.
🔧 Problem: One side of the mower cuts lower than the other
Likely cause: Uneven skid shoe wear, low tyre pressure on one side, or a bent drawbar. Check and equalise shoe height first — this is the most common cause. Then check both tyre pressures (should be equal, typically 150–200 kPa). If the bar still tilts, inspect the drawbar hitch and chassis frame for bending, which can result from towing over deep ruts or hitting a hidden obstacle at speed.
From mowing to grinding, each piece of forage equipment demands its own maintenance schedule to deliver reliable seasonal performance.
Spare Parts Supply: Keeping Critical Items On-Hand
The difference between a 30-minute field fix and a 3-day wait for parts often comes down to what is on the ute tray. EverPower Baling Machinery Australia recommends keeping these items on-farm during the mowing season: one complete spare knife-bar assembly (sharpened and ready), 6–8 individual knife sections with matching bolts, 4 spare guard plates, 1 spare skid shoe pair, 1 pitman ball joint kit, and a grease gun with EP2 cartridges. Total on-farm spare-parts investment runs approximately AUD $350–$500 — roughly the cost of one day’s lost mowing productivity if a breakdown halts the harvest. EverPower’s Condell Park warehouse stocks all of these components for the 9GD-2.5, and metropolitan Sydney orders placed before 2:00 PM typically dispatch same-day. Regional NSW and interstate orders reach most addresses within 2–3 business days via standard freight.

EverPower’s quality inspection process ensures every replacement part meets original equipment specifications.
Recommended Product: 9GD-2.5 Traction Single-Blade Mower
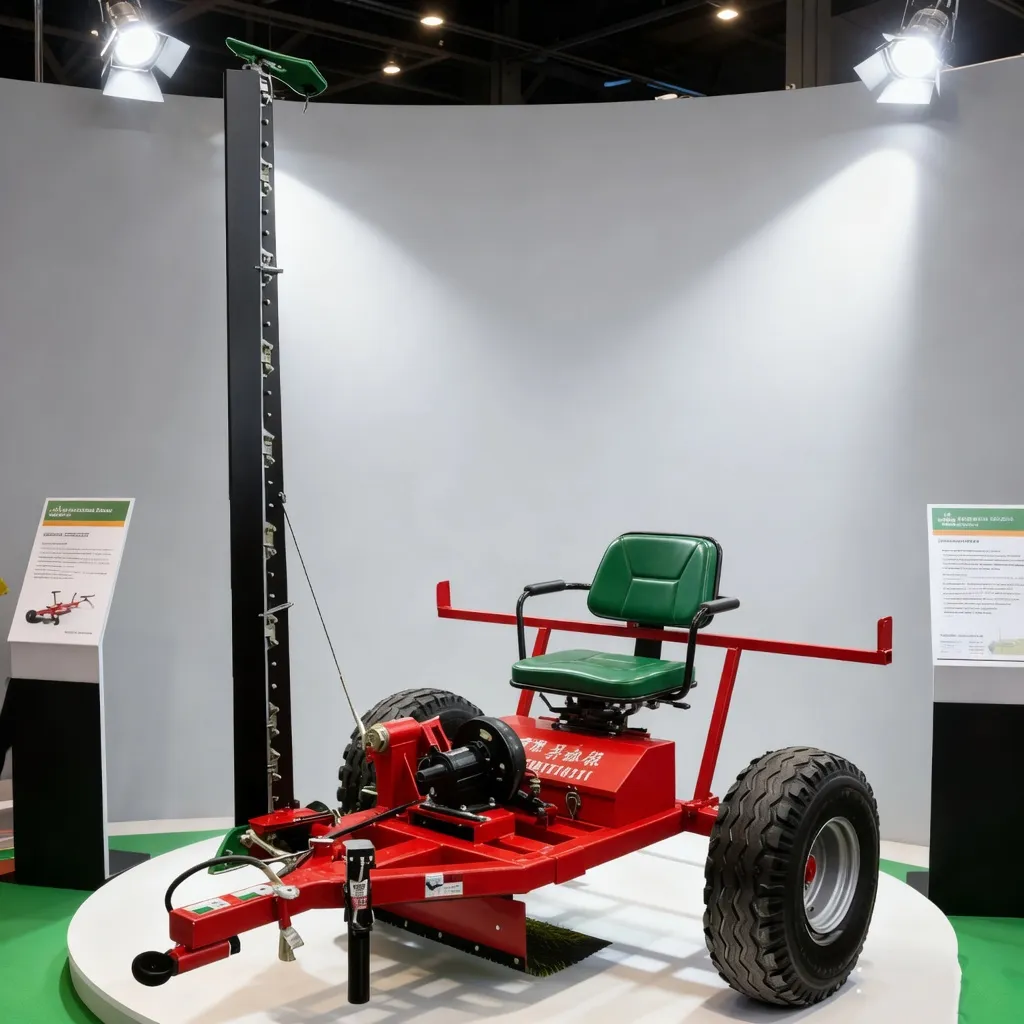
Built for Australian conditions with field-replaceable knife sections, hardened guard plates, and a serviceable pitman assembly. The 9GD-2.5 is designed for straightforward maintenance with common workshop tools. Full spare-parts stock maintained at EverPower’s Sydney warehouse, with technical support available for maintenance guidance and part identification.
Frequently Asked Questions
Keep Your Mower Running at Peak Performance
EverPower stocks blades, guards, pitman kits, and every wear part for the 9GD-2.5. Order before the season starts and avoid mid-harvest delays.
EverPower Baling Machinery Australia Pty Ltd | 27 Harley Crescent, Condell Park NSW 2200
📞 +61 2 9708 3322 | ✉️ [email protected]